> ## Documentation Index
> Fetch the complete documentation index at: https://pigeonholeapp.co.uk/docs/llms.txt
> Use this file to discover all available pages before exploring further.
# Managing Documents
> How to upload, organise, and manage documents for your nursery.
# Managing Documents
Pigeonhole provides a document management system for organising nursery documents such as policies, procedures, permission slips, and child-specific files. You can upload files, organise them into folders, and control who can see them.
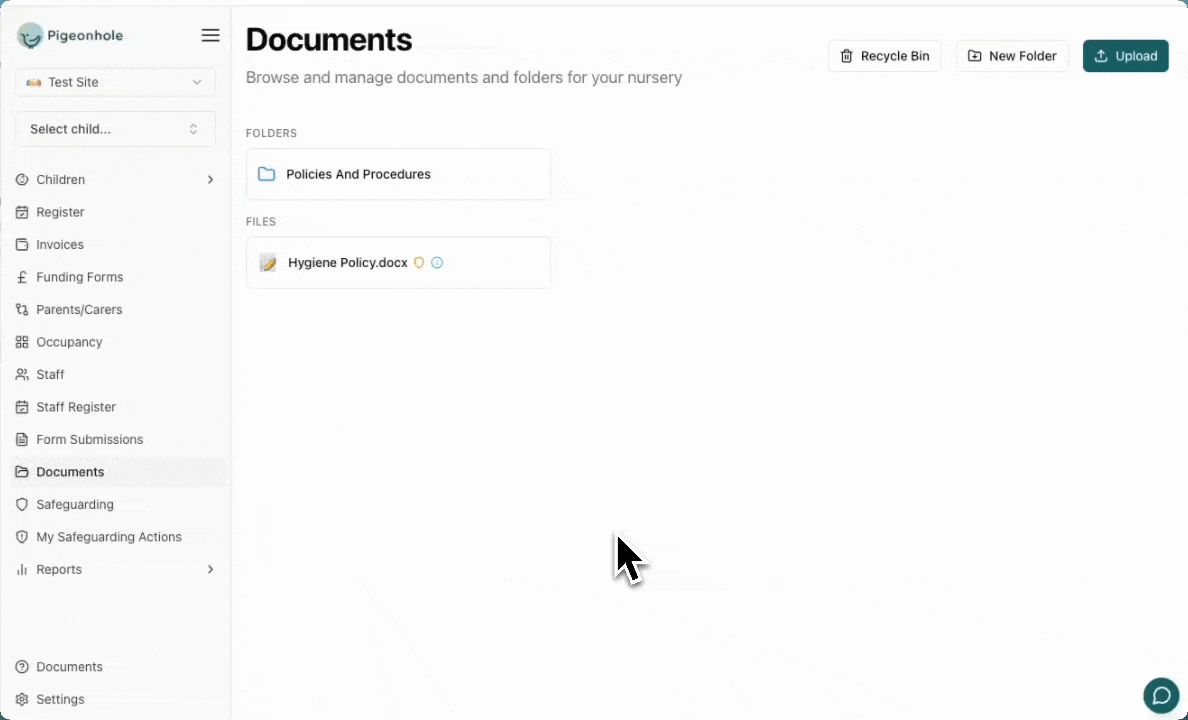
## Accessing Documents
To access the documents section, click **Documents** in the main navigation.
## Permissions
Admin users and staff with the **Docs** permission can upload, edit, and delete documents. Other staff members can view documents but cannot make changes.
## Uploading Documents
To upload a new document:
1. Click the **Upload** button in the top-right corner
2. Drag and drop a file into the upload area, or click to select a file from your device
3. Enter a **Document Name** (this is auto-filled from the file name but can be changed)
4. Choose the **Visibility** level to control who can see the document
5. Click **Upload** to save the document
Supported file types are PDF, Word (.docx), and PowerPoint (.pptx). Files must be 50 MB or smaller.
 ### Visibility Options
When uploading a document, you can set its visibility:
* **Public** — visible to all staff and parents/carers
* **Parents/Carers** — visible to staff and parents/carers
* **Staff** — visible to staff members only
* **Managers** — visible to managers and admins only
## Creating Folders
Folders help you organise documents by category, such as "Policies", "Permission Slips", or "Training Materials".
To create a new folder:
1. Click the **New Folder** button in the top-right corner
2. Enter a **Folder Name**
3. Click **Create**
## Editing Documents
To edit an existing document:
1. Click the edit icon on the document card
2. Update the **Document Name**, **Visibility**, or replace the file as needed
3. Click **Save** to apply your changes
## Child-Linked Documents
Documents can be linked to a specific child when uploading. Child-linked documents are visible to that child's parents and carers in the parent portal, making it easy to share individual permission slips, reports, or other child-specific files.
When a document is linked to a child, the child's name is displayed on the document card for easy identification.
## Viewing Documents
To view a document, click on it in the document list:
* **PDFs** open inline in a slide-out viewer with page navigation and download options
* **Other file types** can be downloaded to your device
## Recycle Bin
When you delete a document, it is moved to the recycle bin rather than being permanently removed. This gives you a safety net in case you delete something by accident.
To access the recycle bin:
1. Click the **Recycle Bin** button in the top-right corner of the documents page
2. Browse deleted documents — each entry shows the document name, linked child (if any), and when it was deleted
3. Click **Restore** to move a document back to the root folder
Deleted documents are kept in the recycle bin for 7 days. After 7 days, they are permanently removed and cannot be recovered.
## AI Generated Summaries
AFtrer upload, documents are processed to extract key information, which is available by clicking on the info icon on the document.
### Visibility Options
When uploading a document, you can set its visibility:
* **Public** — visible to all staff and parents/carers
* **Parents/Carers** — visible to staff and parents/carers
* **Staff** — visible to staff members only
* **Managers** — visible to managers and admins only
## Creating Folders
Folders help you organise documents by category, such as "Policies", "Permission Slips", or "Training Materials".
To create a new folder:
1. Click the **New Folder** button in the top-right corner
2. Enter a **Folder Name**
3. Click **Create**
## Editing Documents
To edit an existing document:
1. Click the edit icon on the document card
2. Update the **Document Name**, **Visibility**, or replace the file as needed
3. Click **Save** to apply your changes
## Child-Linked Documents
Documents can be linked to a specific child when uploading. Child-linked documents are visible to that child's parents and carers in the parent portal, making it easy to share individual permission slips, reports, or other child-specific files.
When a document is linked to a child, the child's name is displayed on the document card for easy identification.
## Viewing Documents
To view a document, click on it in the document list:
* **PDFs** open inline in a slide-out viewer with page navigation and download options
* **Other file types** can be downloaded to your device
## Recycle Bin
When you delete a document, it is moved to the recycle bin rather than being permanently removed. This gives you a safety net in case you delete something by accident.
To access the recycle bin:
1. Click the **Recycle Bin** button in the top-right corner of the documents page
2. Browse deleted documents — each entry shows the document name, linked child (if any), and when it was deleted
3. Click **Restore** to move a document back to the root folder
Deleted documents are kept in the recycle bin for 7 days. After 7 days, they are permanently removed and cannot be recovered.
## AI Generated Summaries
AFtrer upload, documents are processed to extract key information, which is available by clicking on the info icon on the document.