> ## Documentation Index
> Fetch the complete documentation index at: https://pigeonholeapp.co.uk/docs/llms.txt
> Use this file to discover all available pages before exploring further.
# Funding Portal Extension
> How to use the portal manager to simplify entering data into council portals.
# Using the portal manager
The chrome portal manager extension can be installed from the [chrome webstore](https://chromewebstore.google.com/detail/pigeonhole-early-years-po/ceklmaafenefnnodkiiippeabepkkhbf)
Once installed you can pin the extension by clicking on extensions and selecting the pin next to the Pigeonhole extension.
 The portal manager will then show up in the toolbar within chrome.
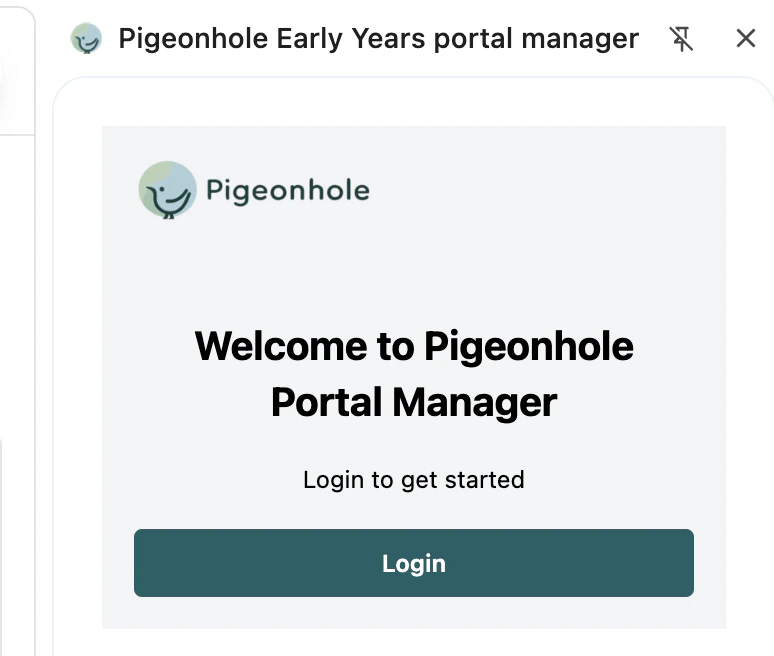
 When you open the chrome extension you are shown the login page where you can login to pigeonhole as you would do normally when using the website.
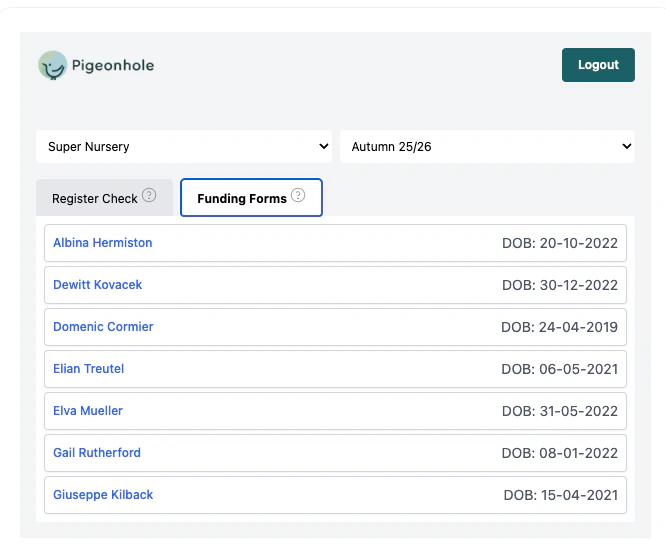
 Once logged in you can select a term and easily view all child and funding data.
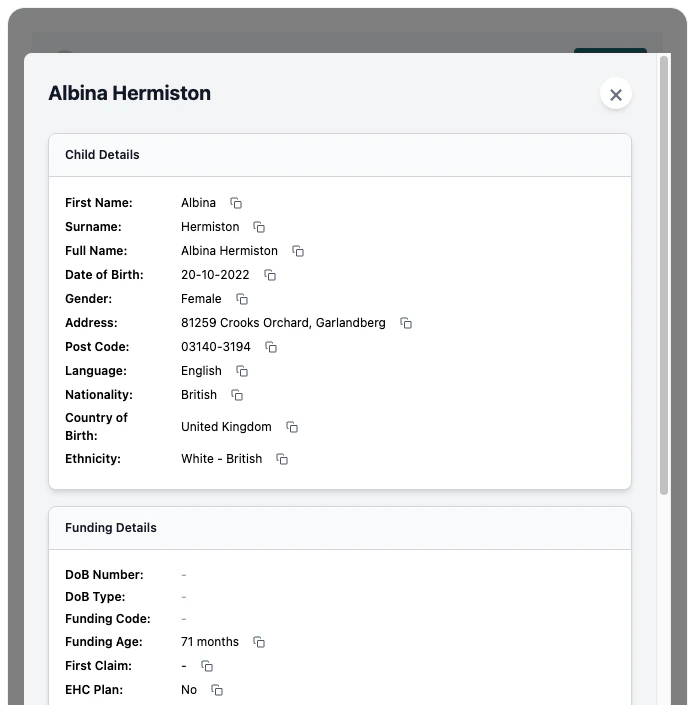
 By clicking on a child you can view all the funding data about that child, and copy it with a single click. This makes all pigeonhole data easily available to you in a sidebar while working on portal submissions, making the data entry a quick and easy process. In addition if your council uses the Liquid Logic/System C portal, you can automatically check data against [the live register](./live-register-check.mdx).
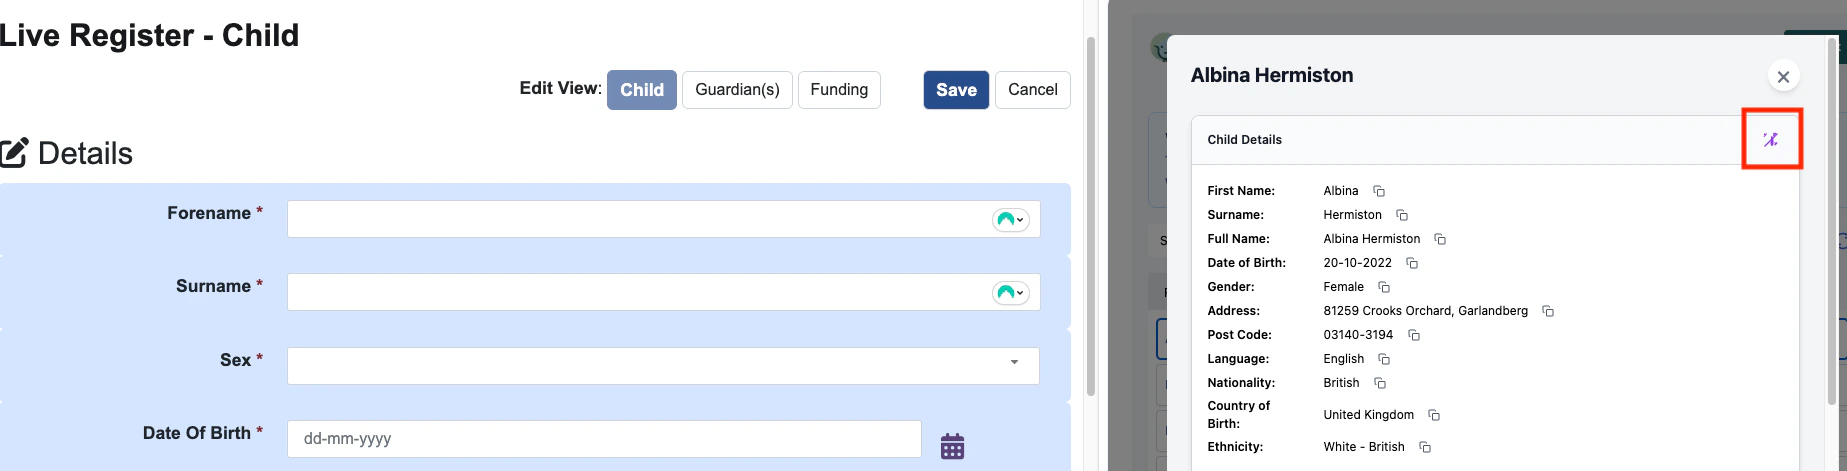
 ## Intelligent Auto-Fill
The Portal Manager includes an intelligent auto-fill feature that can dramatically speed up your data entry process when working with council portals. This feature helps you automatically populate form fields on the portal page with data from Pigeonhole.
### How to Use Intelligent Auto-Fill
1. Click on a child in the Portal Manager to open their details.
2. Look for the magic wand icon 🪄 in the section headers (Child Details, Funding Details, etc.).
3. When you're on the corresponding form in the council portal, click the magic wand icon.
4. The extension will automatically detect form fields on the page and fill them with the appropriate data from Pigeonhole.
## Intelligent Auto-Fill
The Portal Manager includes an intelligent auto-fill feature that can dramatically speed up your data entry process when working with council portals. This feature helps you automatically populate form fields on the portal page with data from Pigeonhole.
### How to Use Intelligent Auto-Fill
1. Click on a child in the Portal Manager to open their details.
2. Look for the magic wand icon 🪄 in the section headers (Child Details, Funding Details, etc.).
3. When you're on the corresponding form in the council portal, click the magic wand icon.
4. The extension will automatically detect form fields on the page and fill them with the appropriate data from Pigeonhole.
 ### What Intelligent Auto-Fill Does
* **Smart Field Detection**: The auto-fill feature intelligently recognizes input fields on the portal page, matching them with the relevant Pigeonhole data.
* **Different Data Types**: You can auto-fill different types of information:
* **Child Details**: First name, surname, date of birth, address, etc.
* **Funding Details**: Funding codes, eligibility information, hours, etc.
* **Parent Information**: Parent details including name, contact information, and NI numbers.
* **Time-Saving**: Eliminates manual copying and pasting, reducing errors and saving significant time during the funding submission process.
### Tips for Using Auto-Fill
* Make sure you're on the correct page in the portal before clicking the wand icon.
* If some fields don't auto-fill correctly (e.g. some dropdowns), you can still use the individual copy buttons next to each field.
* If any fields are not shown initially in the portal, if you change fields to make them show, you can click autofill again to update any data.
Note we dont overwrite existing data you you can safely autofill after any updates.
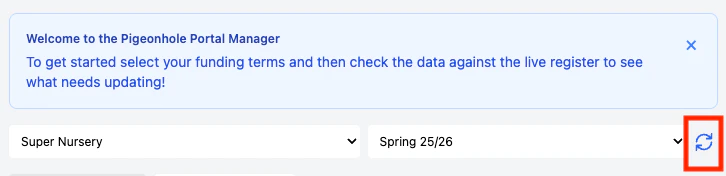
## Refreshing Data
To ensure you're always working with the most current information, the Portal Manager provides a simple way to refresh funding data:
### How to Refresh Data
1. After selecting a site and term, you'll see a refresh button 🔄 next to the term dropdown.
2. Click this refresh button to fetch the latest funding data from Pigeonhole.
3. The Portal Manager will reload all funding information for the selected term, ensuring you have the most up-to-date details.
### What Intelligent Auto-Fill Does
* **Smart Field Detection**: The auto-fill feature intelligently recognizes input fields on the portal page, matching them with the relevant Pigeonhole data.
* **Different Data Types**: You can auto-fill different types of information:
* **Child Details**: First name, surname, date of birth, address, etc.
* **Funding Details**: Funding codes, eligibility information, hours, etc.
* **Parent Information**: Parent details including name, contact information, and NI numbers.
* **Time-Saving**: Eliminates manual copying and pasting, reducing errors and saving significant time during the funding submission process.
### Tips for Using Auto-Fill
* Make sure you're on the correct page in the portal before clicking the wand icon.
* If some fields don't auto-fill correctly (e.g. some dropdowns), you can still use the individual copy buttons next to each field.
* If any fields are not shown initially in the portal, if you change fields to make them show, you can click autofill again to update any data.
Note we dont overwrite existing data you you can safely autofill after any updates.
## Refreshing Data
To ensure you're always working with the most current information, the Portal Manager provides a simple way to refresh funding data:
### How to Refresh Data
1. After selecting a site and term, you'll see a refresh button 🔄 next to the term dropdown.
2. Click this refresh button to fetch the latest funding data from Pigeonhole.
3. The Portal Manager will reload all funding information for the selected term, ensuring you have the most up-to-date details.
 ### When to Refresh Data
It's recommended to refresh data in these situations when you've made changes to a child's funding information in Pigeonhole.
Refreshing ensures that the data you're copying or auto-filling into the portal matches exactly what's in your Pigeonhole system, reducing errors and data inconsistencies.
## Direct Access to Funding Forms
The Portal Manager includes a quick way to access a child's funding form directly in Pigeonhole through an external link button.
### Using the External Link Button
1. In the list of children, you'll notice an external link icon ↗️ next to each child's name.
2. Clicking this icon will open the corresponding funding form directly in Pigeonhole in a new browser tab.
3. This allows you to quickly view or edit the full funding form details in Pigeonhole while still keeping the Portal Manager open.
### When to Refresh Data
It's recommended to refresh data in these situations when you've made changes to a child's funding information in Pigeonhole.
Refreshing ensures that the data you're copying or auto-filling into the portal matches exactly what's in your Pigeonhole system, reducing errors and data inconsistencies.
## Direct Access to Funding Forms
The Portal Manager includes a quick way to access a child's funding form directly in Pigeonhole through an external link button.
### Using the External Link Button
1. In the list of children, you'll notice an external link icon ↗️ next to each child's name.
2. Clicking this icon will open the corresponding funding form directly in Pigeonhole in a new browser tab.
3. This allows you to quickly view or edit the full funding form details in Pigeonhole while still keeping the Portal Manager open.
 ### Benefits of Direct Access
* **Quick Edits**: If you notice discrepancies or need to update information, you can directly access and edit the form in Pigeonhole.
* **Seamless Workflow**: Maintain your workflow by keeping both the portal and Pigeonhole open simultaneously.
After making changes in Pigeonhole, remember to use the refresh button in the Portal Manager to update the data before continuing with portal submissions.
## Updating the extension
Extensions should update automatically, to force an update you can:
* Navigate to [the chrome extensions dialog](chrome://extensions/)
* Click 'Details' on the Pigeonhole Extension
* Click 'Update'
### Benefits of Direct Access
* **Quick Edits**: If you notice discrepancies or need to update information, you can directly access and edit the form in Pigeonhole.
* **Seamless Workflow**: Maintain your workflow by keeping both the portal and Pigeonhole open simultaneously.
After making changes in Pigeonhole, remember to use the refresh button in the Portal Manager to update the data before continuing with portal submissions.
## Updating the extension
Extensions should update automatically, to force an update you can:
* Navigate to [the chrome extensions dialog](chrome://extensions/)
* Click 'Details' on the Pigeonhole Extension
* Click 'Update'
