Web-Based CSV Import
Access the import page from your Pigeonhole dashboard at Settings → Import. Features:- AI-Powered Column Mapping: Upload any CSV file and our AI automatically maps columns to the correct fields
- Built-in Editor: Review and edit all extracted data before importing
- Duplicate Detection: Automatically flags potential duplicates with warning icons
- Bulk Import: Import hundreds of records in one go
- Support for Any Format: Works with CSV exports from any nursery software
What is a CSV File?
A CSV (Comma-Separated Values) file is a simple spreadsheet format that most software can open and export. It looks like a spreadsheet but saves data as plain text, making it easy to move between different systems. You don’t need to create a CSV from scratch — most nursery software lets you export your data as a CSV directly. If you already have data in Excel or Google Sheets, you can convert it in a few steps.How do I save an Excel file as a CSV?
How do I save an Excel file as a CSV?
- Open your spreadsheet in Microsoft Excel
- Click File → Save As
- Choose where to save the file
- In the “Save as type” dropdown, select CSV (Comma delimited) (*.csv)
- Click Save — Excel may warn you about features not supported in CSV; click Yes to continue
- Your file is now ready to upload to Pigeonhole
If you have multiple sheets in your workbook, only the currently visible sheet will be saved as a CSV. Make sure the correct sheet is active before saving.
How do I save a Google Sheets file as a CSV?
How do I save a Google Sheets file as a CSV?
- Open your spreadsheet in Google Sheets
- Click File → Download
- Select Comma Separated Values (.csv)
- The file will download automatically to your computer
- Upload this file to Pigeonhole
I only have an Excel (.xlsx) file — can I upload that?
I only have an Excel (.xlsx) file — can I upload that?
Pigeonhole’s CSV import accepts
.csv files only. If you have an Excel file, follow the steps above to save it as a CSV first. It only takes a moment and won’t affect your original Excel file.What should my CSV look like?
What should my CSV look like?
Your CSV should have:
- A header row in the first row (column names like “First Name”, “Date of Birth”, “Email”)
- One record per row — each row is one child, parent, or staff member
- Consistent formatting — for example, all dates in the same format
Recommended Import Order
- Children first — children must exist in Pigeonhole before parents or funding forms can be linked to them
- Parents/Carers second — relatives are linked to children during import
- Staff last — staff records are independent but can reference children
- Funding Forms — funding forms reference children, so import children first
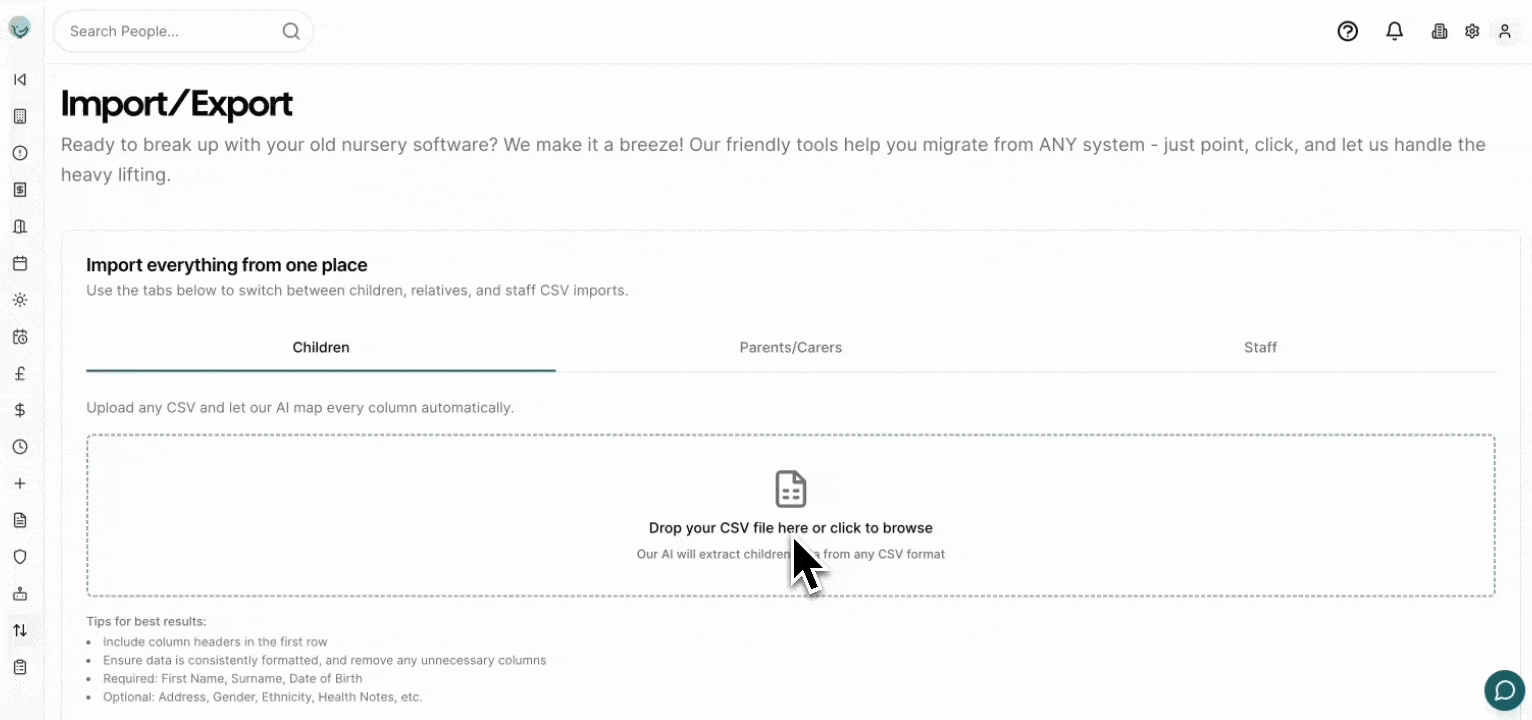
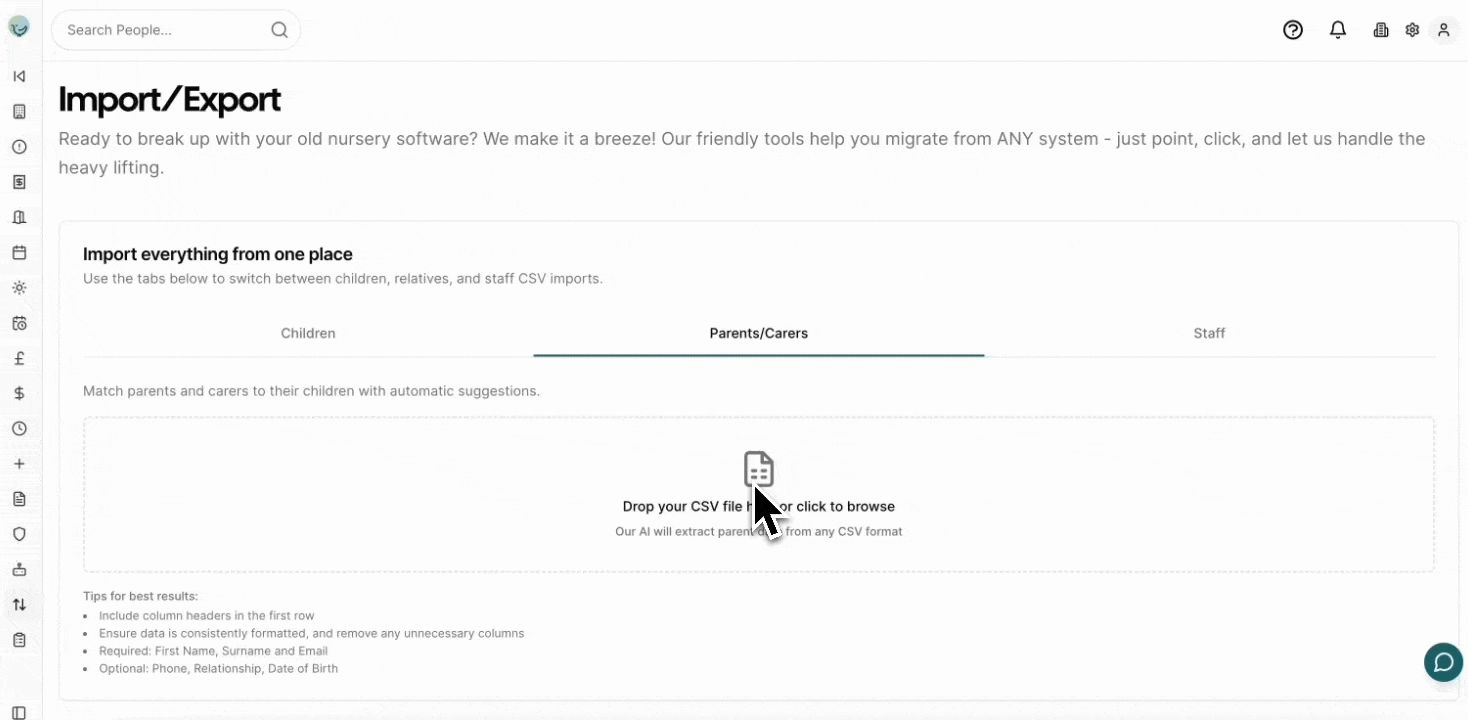
How to Import via CSV
- Navigate to Settings > Import/Export in Pigeonhole
- Choose the tab for what you want to import (Children, Parents/Carers, Staff, or Funding Forms)
- Download our template (optional but recommended) or use your own CSV export from your existing system
- Upload your CSV file by clicking or dragging and dropping into the upload area
- Wait for AI processing — our AI will automatically extract and map your data columns
- Review in the built-in editor:
- Check the extracted information looks correct
- Edit any fields directly in the table
- Remove rows you don’t want to import using the delete button
- Pay attention to warning icons that indicate potential duplicates
- Click “Import” to save the records to Pigeonhole
What Each Tab Imports
Children
Imports child records including personal details, medical information, and custom attributes. Key fields:- First Name, Surname, Date of Birth (required)
- Start Date, Gender
- Address (Line 1, Town, County, Post Code)
- Health Notes, Allergies, Dietary requirements
- Collection Password
- Flags: Term Time Only, Two Year Funded, Looked After, EHC Plan, SEN, Pupil Premium, Free School Meals, EAL
- Any custom attributes you have set up in Pigeonhole
Parents/Carers
Imports parent and carer records and links them to their children.Import children before parents. Children must already exist in Pigeonhole so that parents can be linked to them correctly during import.
- First Name, Surname, Email (required for parents and carers)
- Phone Number (required for emergency contacts)
- Relationship (Mother, Father, Grandmother, Grandfather, Other, Emergency Contact)
- Date of Birth
- Bill Payer — whether this person receives invoices
- Parental Responsibility — whether this person has legal parental responsibility
| Child First Name | Child Surname | Parent 1 First Name | Parent 1 Email | Parent 2 First Name | Parent 2 Email | … |
|---|---|---|---|---|---|---|
| Emma | Smith | Sarah | sarah@example.com | John | john@example.com | … |
Staff
Imports staff member records. Key fields:- First Name, Surname, Email (required)
- Phone Number
Funding Forms
Imports funding form records including child details, funding hours, and parent eligibility information. See the dedicated Funding Forms Import guide for full instructions.Tips for Best Results
- Include a header row — column names in the first row help our AI map your data correctly
- Ensure consistent formatting — for example, use the same date format throughout (e.g. DD/MM/YYYY)
- Remove unnecessary columns — unused columns are simply ignored, but a cleaner file helps the AI
- Use our template as a starting point — it includes all supported column names and is ready to fill in
- Test with a small batch first — import 5–10 records to check everything looks right before doing a full import
- Our AI handles column name variations — “First Name”, “firstname”, “Forename”, and “first_name” all map to the same field
Getting Data from Other Nursery Providers
Below are instructions for exporting data from common nursery software providers. Once you have your CSV export, use the import method above.Note: Export functionality varies by provider. If you cannot find export options, contact your provider’s support team directly.
How do I export data from Baby's Days?
How do I export data from Baby's Days?
- Log in to your Baby’s Days account
- Navigate to the Reports section
- Look for Data Export or CSV Export options
- Select the data type (Children, Parents, Staff) and all available fields
- Download the CSV file
How do I export data from Blossom Educational?
How do I export data from Blossom Educational?
- Access your Blossom admin panel
- Go to Settings or Data Management
- Look for Export Data functionality
- Select the record type to export and download as CSV
How do I export data from Connect Childcare?
How do I export data from Connect Childcare?
- Log in to Connect Childcare
- Navigate to Reports or Admin section
- Find Data Export or Export to Excel/CSV
- Select the data you need and export
How do I export data from Instant Nursery Manager?
How do I export data from Instant Nursery Manager?
- Open Instant Nursery Manager
- Go to Admin Tools or Reports
- Look for Export functionality
- Choose CSV or Excel format and generate the export
How do I export data from Kinderly?
How do I export data from Kinderly?
- Log in to your Kinderly account
- Navigate to Settings > Data Export
- Select the type of data and CSV format
- Download your export
How do I export data from Kindersoft?
How do I export data from Kindersoft?
- Access Kindersoft admin area
- Go to Reports or Data Management
- Find Export or Download Data option
- Select CSV format and download
How do I export data from My Nursery Pal?
How do I export data from My Nursery Pal?
- Log in to My Nursery Pal
- Navigate to Settings or Admin
- Look for Export Data or Data Download
- Select CSV format and download
How do I export data from Nursery Genie?
How do I export data from Nursery Genie?
- Access your Nursery Genie account
- Go to Admin section
- Find Export or Backup Data options
- Select CSV format and download
How do I export data from Nursery in a Box?
How do I export data from Nursery in a Box?
- Log in to Nursery in a Box
- Navigate to Settings > Export
- Select the data category and CSV format
- Download your data
How do I export data from Parenta?
How do I export data from Parenta?
- Log in to your Parenta account
- Go to Reports or Admin Panel
- Look for Data Export or Export to CSV
- Select what you want to export and choose all fields
- Download the CSV file
How do I export data from Red Fish (iConnect)?
How do I export data from Red Fish (iConnect)?
- Access your iConnect/Red Fish account
- Navigate to Settings or Reports
- Find Export Data functionality
- Select CSV format and download
How do I export data from Tapestry?
How do I export data from Tapestry?
- Log in to your Tapestry account
- Go to Settings > Data Management
- Look for Export or Download Data
- Select CSV format and download the file
How do I export data from Famly?
How do I export data from Famly?
- Log in to your Famly account
- Navigate to Settings > Data Export
- Select the type of data to export and CSV format
- Download your export file (ensure you select “All Fields” for best results)