
Open in app: Announcements.
How announcements work
- Any staff member can write an announcement and save it as a draft. Drafts are private — nobody else, including managers, can see them until they are submitted.
- Staff submit finished announcements for approval. Managers receive an email when something is waiting for them.
- Managers review, edit if needed, and either Send now or Schedule the announcement for a specific date and time. Announcements written by a manager don’t need separate approval — managers can send their own directly.
- Only contacts with parental responsibility receive announcements. Parents get an email with a short preview and a link, and can read the full announcement in the parent portal.
- Once an announcement has been sent, your whole team can read it too — sent announcements are visible to every staff member, and everyone is emailed a copy unless they’ve opted out.
Step 1: Write an Announcement
- Go to Announcements in the sidebar and click New Announcement.
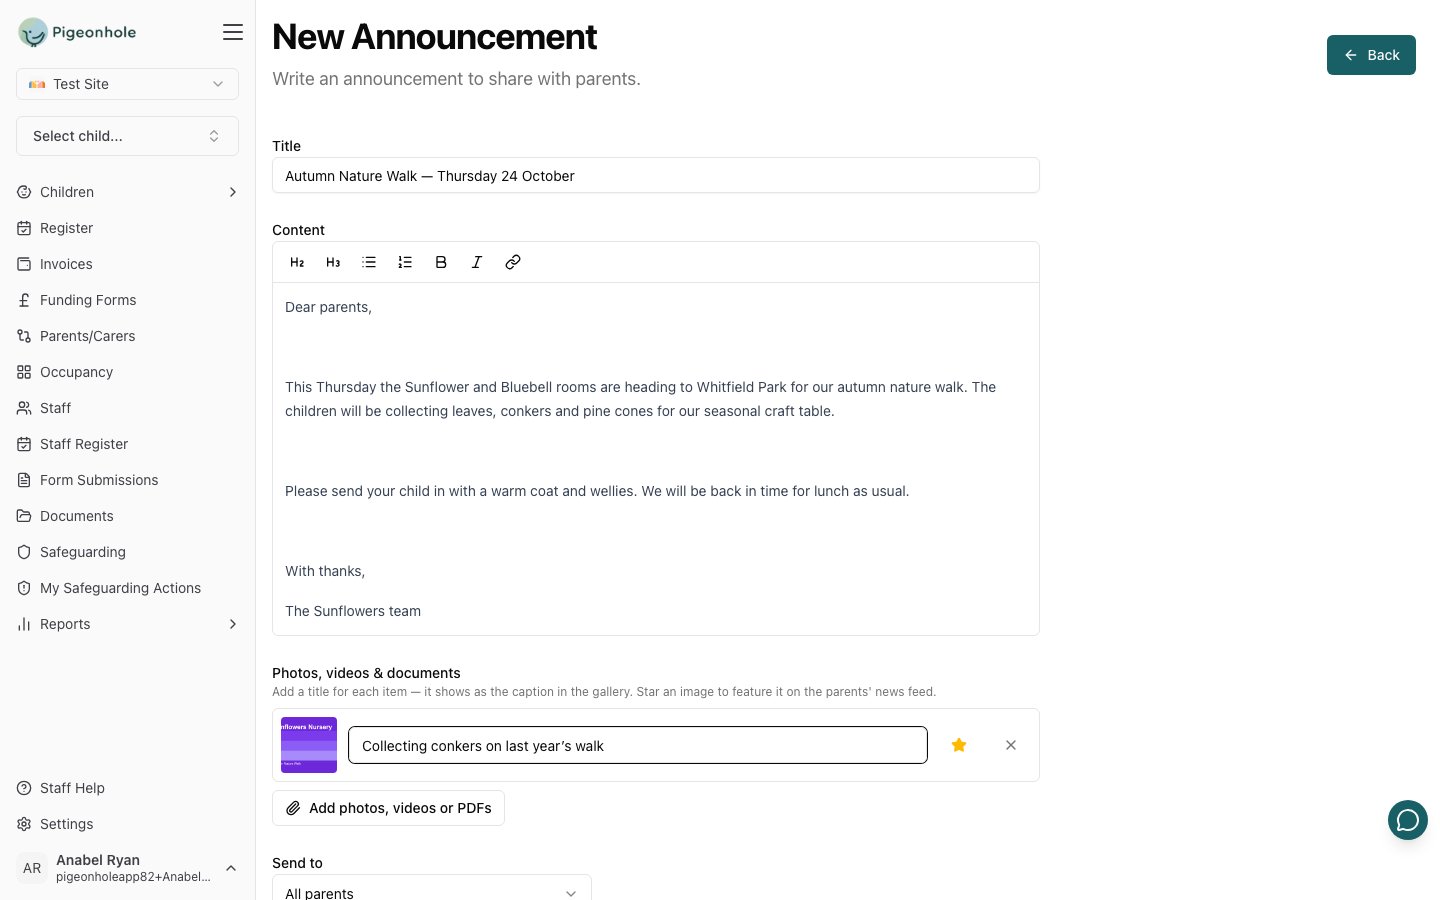
- Enter a Title and write your announcement in the content editor. You can use headings, lists, bold, italics and links.
- Click Add photos, videos or PDFs to attach files. Photos and videos appear as a gallery below the announcement text.
- Give each photo or video a short caption if you like — the caption box starts empty, so add one only where it helps.
Videos up to around 200MB are supported (MP4, MOV or WebM). Photos can be JPG, PNG, GIF, WebP or HEIC.
Choosing the featured image
If you attach photos, one of them becomes the featured image — the thumbnail parents see next to the announcement in their news list. The first photo is used by default. To choose a different one, click the star next to that photo so it turns amber.
Step 2: Choose the Audience
Select who should receive the announcement under Send to:- All parents — every parent with parental responsibility for a child currently at the setting.
- Parents of children in today — parents of children booked in on the day the announcement is sent. Turn on Include absent children if parents of children who are booked in but marked absent should receive it too.
- Parents of specific children — pick individual children; only their parents receive it.
The audience is worked out when the announcement is actually sent — not when it is written. A scheduled announcement to “children in today” uses the register for the day it goes out.
Step 3: Save, Submit or Send
What you can do depends on your role:- Staff can Save draft or Submit for approval. Submitting notifies the setting’s managers by email. You can withdraw a submitted announcement back to your drafts if you need to make changes.
- Managers can Save draft, Send now, or pick a date and time and Schedule. When reviewing a staff submission, managers can edit the content first, then send or schedule it — or delete it if it shouldn’t go out.
After Sending
- The announcement appears in the parent portal under News, and each recipient gets an email with a preview and a link to read the full announcement.
- Your team is emailed too, so everyone knows what parents have been told. Whoever published it isn’t emailed their own announcement, and any staff member can turn these emails off under Staff notifications on their My Account page.
- Open a sent announcement to see the Recipients list — everyone it was sent to, grouped by child.
- Managers can still Edit a sent announcement. Changes update the parent portal copy quietly — no second email is sent.
- Managers can Delete a sent announcement to remove it from the parent portal.
Fixing the Recipients After Sending
Sometimes an announcement goes to the wrong group — or you realise a family should have been included. Managers can adjust the recipient list of a sent announcement without resending it to everyone. The audience type (all parents, in today, specific children) is fixed once sent; instead, you add and remove recipients by child. Open the sent announcement and use the Recipients panel:- Add a child — pick a child from the Add a child… dropdown. All of that child’s contacts with parental responsibility are added, gain access in the parent portal, and are emailed the announcement.
- Remove a child — click the bin icon next to a child. That child’s parents lose access in the parent portal and the announcement disappears from their news list.
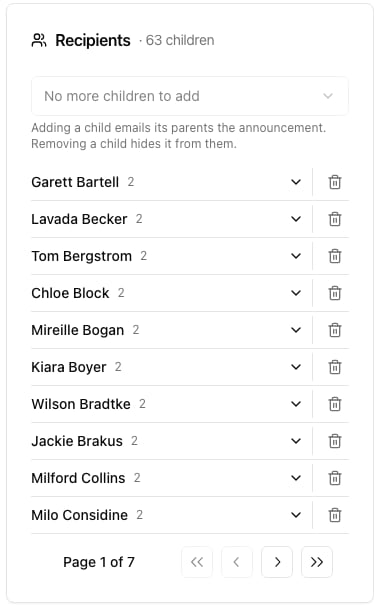
A parent linked to more than one recipient child keeps access until all of their children are removed.