
My Account
The My Account page is where you manage your Pigeonhole subscription and billing, keep your login secure, set the PIN you use on shared devices, choose which emails we send you, and — if you ever need to — delete your account. What you see depends on your role: only owners and admins see the subscription and billing section, and the Manage PIN and Staff notifications cards only appear for staff and admin users.Open in app: My Account.
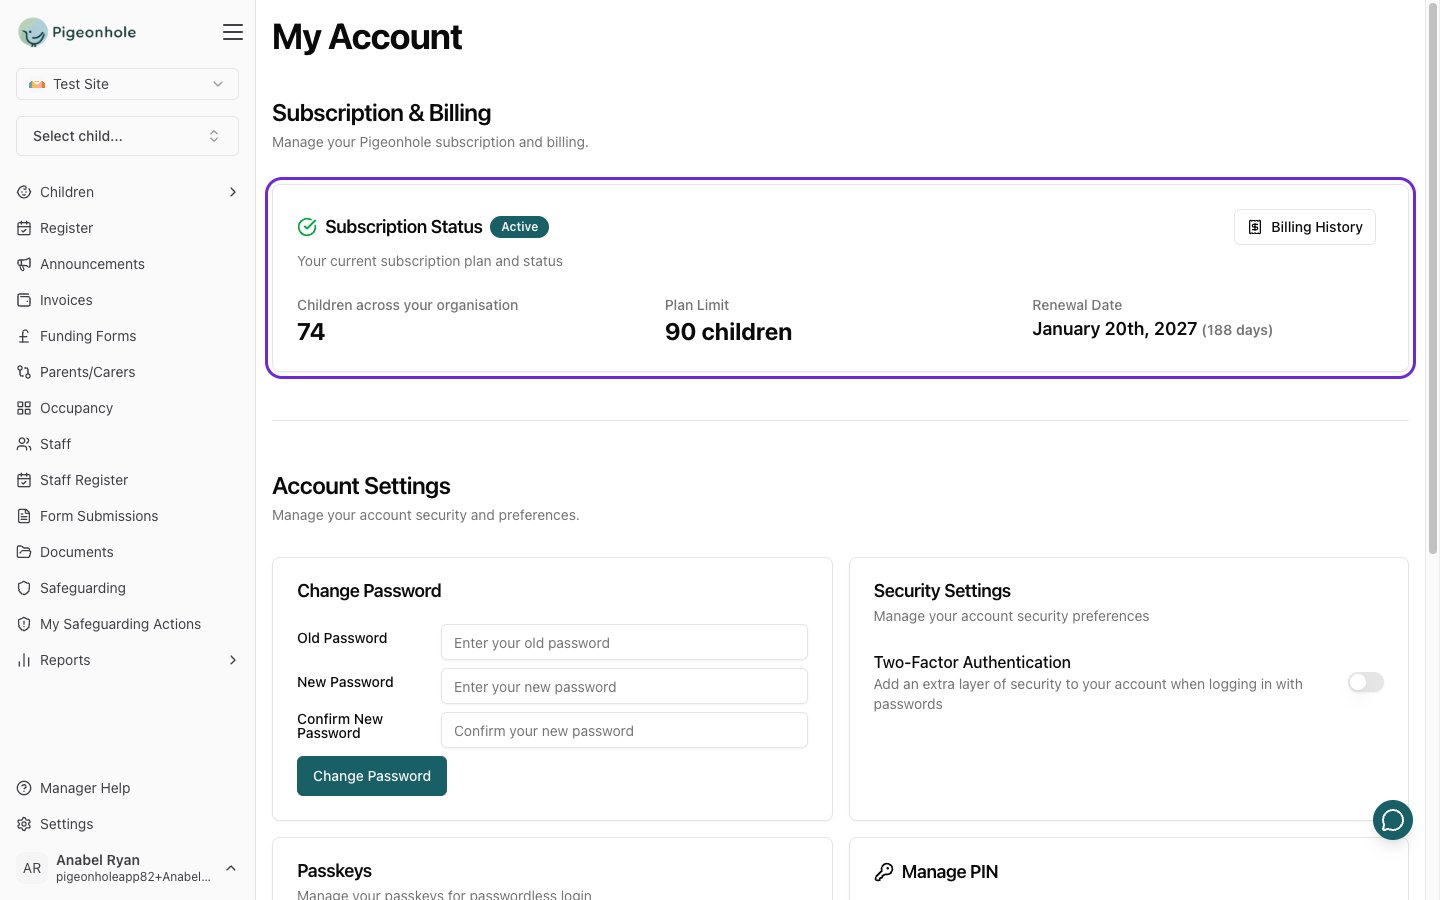
Subscription & Billing
If you’re the account owner or an admin, the top of the page shows your current subscription so you can keep an eye on your plan, your child count, and your renewal date.Viewing your subscription status
The Subscription Status card shows:- A status badge — Trial, Active, Expired, Cancelled, or None.
- Current Children — how many children you currently have (or Children across your organisation if your setting belongs to an organisation).
- Plan Limit — the maximum number of children your plan allows, where a limit applies.
- Trial Ends, Renewal Date, or Access Until — when your trial finishes, your subscription next renews, or a cancelled subscription stops, with the number of days remaining.
Renewing or upgrading
- When a renewal or upgrade is available — for example during a trial, as renewal approaches, or once a subscription has expired — a renewal button appears in the top-right of the Subscription Status card.
- Click it to open the renewal window, choose your plan, and complete payment.
- After paying, a green Payment Successful! banner confirms your subscription is up to date. If you cancel at the checkout, you’ll see a Payment Canceled banner instead and no charge is made — you can try again whenever you’re ready.
Viewing your payment history
Click the payment history button in the Subscription Status card to review your past payments and invoices.If your setting is part of an organisation, subscription and billing are managed by the organisation owner. You’ll only see this section if you have the right role.
Account Settings
The Account Settings section is available to everyone and holds the security controls for your own login.Change Password
- In the Change Password card, enter your Old Password (if you already have one set).
- Enter your New Password. It must be at least 6 characters and include an uppercase letter, a lowercase letter, and a special character.
- Enter it again in Confirm New Password.
- Click Change Password.
If you sign in with a passkey or one-time code and have never set a password, this card shows Set Password instead, and you won’t be asked for an old password.
Security Settings
The Security Settings card lets you turn Two-Factor Authentication on or off. When enabled, it adds an extra layer of security when you sign in with a password. Use the switch to toggle it — the change is saved immediately.Passkeys
Passkeys let you sign in without a password, using your device’s fingerprint, face, or screen lock.- The Passkeys card lists any passkeys you’ve registered, along with the device name and when each was created and last used.
- To set up a passkey, choose the passkey option when you sign in — new passkeys are created during login, not from this page.
- To remove a passkey, click the trash icon next to it and confirm. You’ll no longer be able to use that passkey to sign in.
Manage PIN
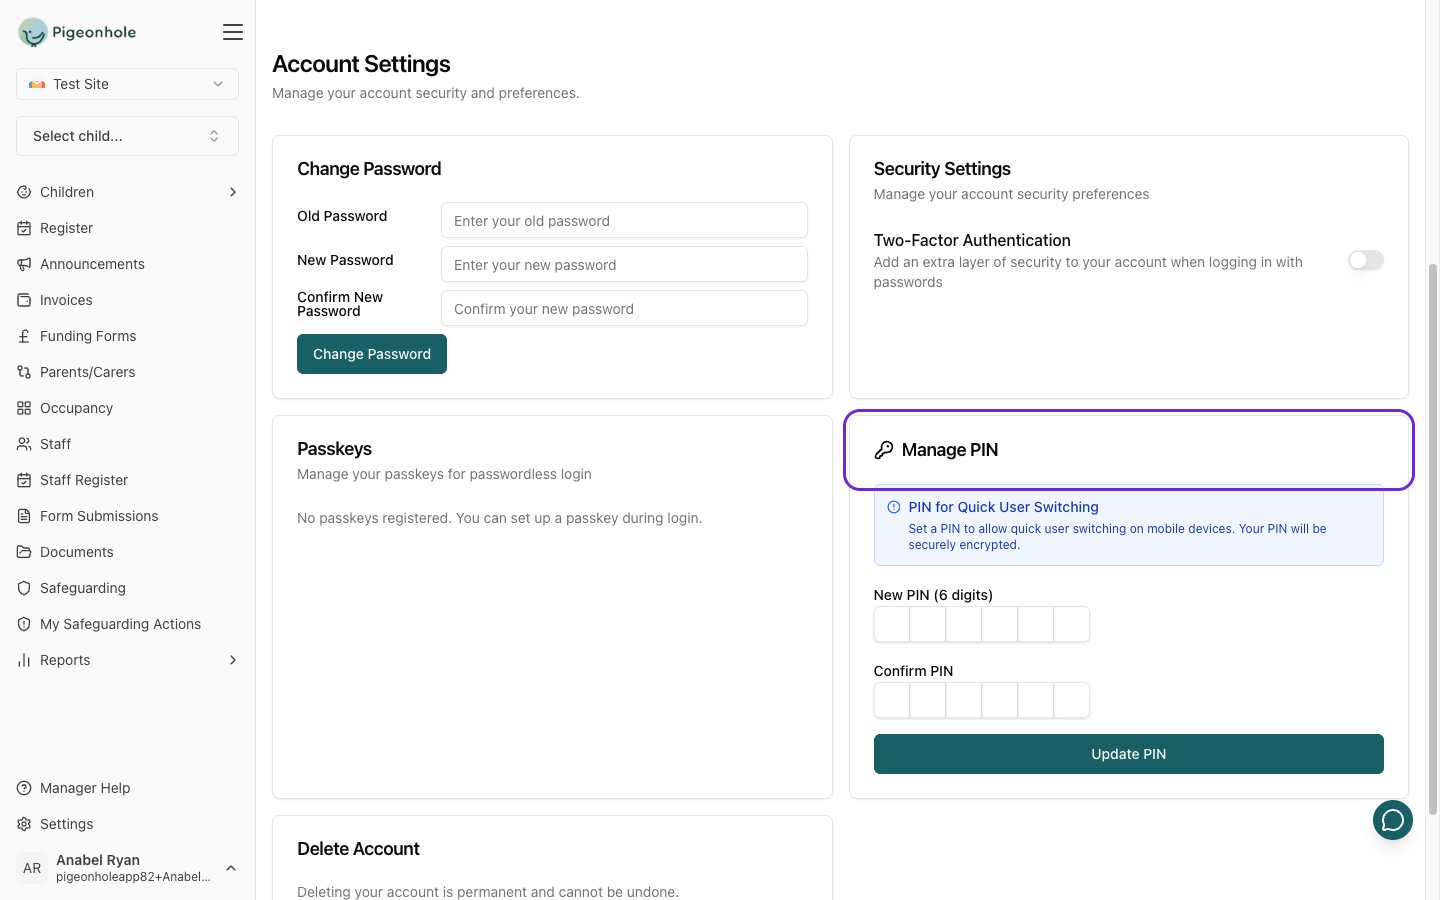
Staff and admin users can set a PIN for quick user switching on shared mobile devices — for example when several team members share a tablet at the register.- In the Manage PIN card, enter a 6-digit New PIN.
- Enter the same digits again in Confirm PIN.
- Click Update PIN.
Managers can also set a PIN on a staff member’s behalf from the Staff page — the PIN is generated, emailed to them, and shown to the manager once. Use this for new starters, forgotten PINs, or staff who can’t sign in here because their setting uses authorised devices.
Staff Notifications
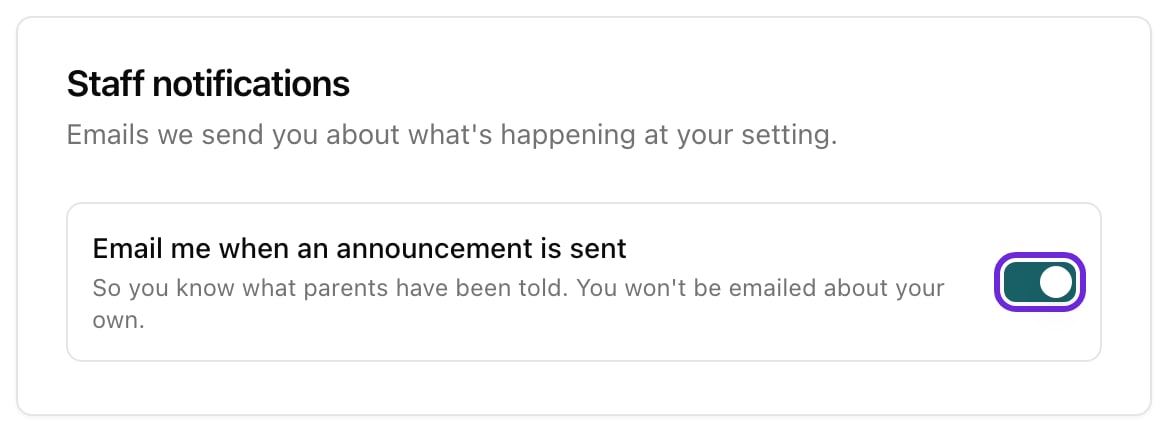
The Staff notifications card controls the emails Pigeonhole sends you about what’s happening at your setting. It appears for staff and admin users.Announcement emails
When someone publishes an announcement to families, everyone on the team gets an email so you know what parents have been told — useful when a parent mentions it at pick-up and you haven’t seen it yourself.- The switch is on by default. Turn it off if you’d rather not be emailed.
- The change saves as soon as you toggle it.
- You’re never emailed about an announcement you published yourself.
- The email links straight to the announcement in Pigeonhole, so you can read it in full.
Turning this off only stops the emails. You can still read every announcement that has been sent at any time from the Announcements page.
Delete Account
- In the Delete Account card, click Delete Account.
- Confirm when prompted.