
Open in app: Settings → Invoicing.
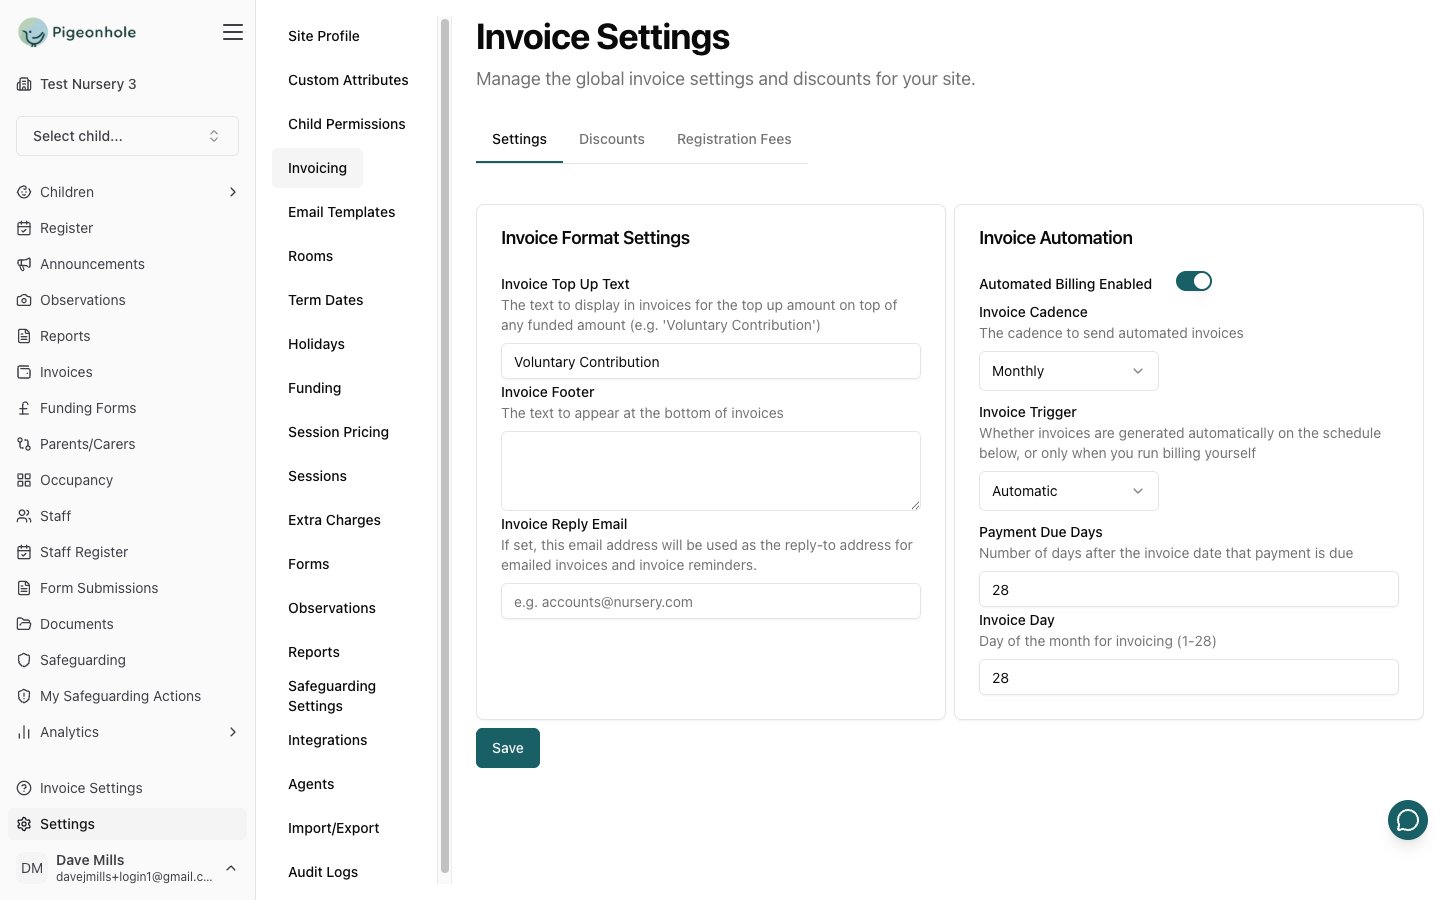
Invoice Format Settings
This card controls how your invoices read:- Invoice Top Up Text - The label used on invoices for the top-up amount charged above any funded amount, for example “Voluntary Contribution”.
- Invoice Footer - Text that appears at the bottom of every invoice.
- Invoice Reply Email - If set, parent replies to emailed invoices and reminders go to this address instead of the default no-reply sender. Leave blank if you don’t need a dedicated reply address.
The Childcare Account Reference (your HMRC childcare account reference) is set per child on the child’s own invoicing settings, not on this site-wide page.
Invoice Automation
This card controls whether Pigeonhole raises invoices automatically:- Turn on Automated Billing Enabled to have invoices created for you.
- Choose an Invoice Cadence:
- Monthly - Then set the Invoice Day (day of the month, 1-28).
- Half Termly or Termly - Then set Invoice Days Before Term Starts.
- Choose an Invoice Trigger:
- Automatic - Invoices are raised on the schedule above with no action from you. This is the default.
- Manual - Invoices are only raised when you press Run Billing on the Invoices page. Useful if you need to reconcile payments first and can’t commit to a fixed date. See Running Billing Manually.
- Set Payment Due Days - the number of days after the invoice date that payment is due.
Step-by-Step
- Go to Settings → Invoicing.
- Fill in the Invoice Format Settings card with your top-up text and footer, and a reply email if you use one.
- In the Invoice Automation card, decide whether to enable automated billing and, if so, choose a cadence and payment terms.
- Click Save.
For discounts, email templates, and per-child overrides, see the detailed Invoice Settings guide and the wider Invoicing section.