Understanding and resolving accountancy sync errors on invoices.
When syncing an invoice to your accounting software (Xero, QuickBooks, etc.) fails, the error is captured and displayed on the invoice so you can investigate and resolve it.
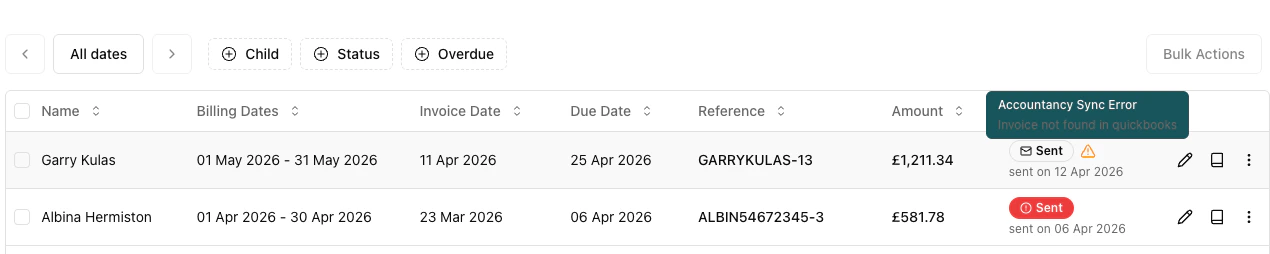
An amber alert triangle icon appears in the invoice table’s Status column when a sync error has occurred. Hover over the icon to see a tooltip showing the error message — this gives you a quick view of what went wrong without opening the invoice.
To see the complete error message, open the invoice by clicking Edit or View from the actions menu. The full integration error is displayed at the top of the invoice detail view.
Retries syncing the existing invoice to your accounting software. Use this when the error was temporary — for example, a network issue, API rate limit, or a brief outage in the accounting service.
Open the invoice actions menu.
Click Resync Invoice.
The system will attempt to sync the invoice again.
Unlinks the current accounting invoice and creates a brand new one in your accounting software. Use this when the accounting invoice is corrupted, has been manually deleted from the accounting system, or needs to be recreated from scratch.This action only appears on invoices that are currently showing a sync error, so you will only see it once an invoice has failed to sync.
Open the invoice actions menu on the erroring invoice.
Click Recreate Accounting Invoice.
Confirm the action in the dialog — this cannot be undone.
Recreating an accounting invoice will unlink the existing invoice in your accounting software. If the original invoice still exists in Xero or QuickBooks, you may need to void or delete it manually to avoid duplicates.