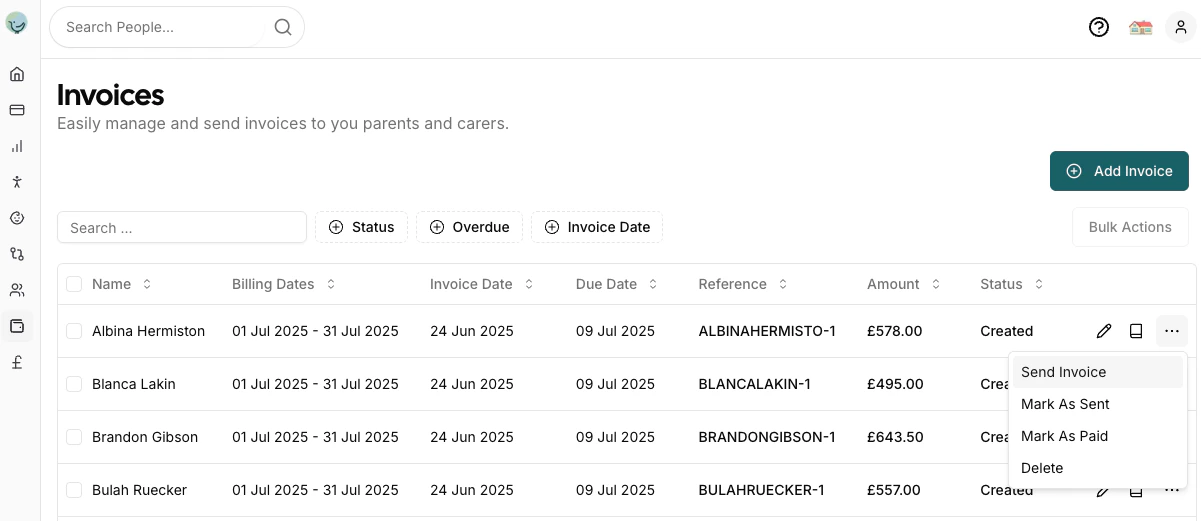
Once invoices have been created, you can view and manage them from the invoices list page. This page displays all invoices in a table format with comprehensive filtering and bulk action capabilities.
You can filter the invoice list using these criteria:
Child: Choose one or more children to see only their invoices.
Status: Filter by invoice status — Created, Sent, or Paid. When your setting has an accounting integration enabled, a Sync Issues option is also shown, which surfaces invoices that failed to sync.
Overdue: Show only invoices that are past their due date and not yet paid.
You can also narrow the list to a date range using the date range selector in the toolbar.
Send Payment Confirmation: Email a payment confirmation to the bill payers with the invoice and a payment receipt attached. See Sending a Payment Confirmation Email.
View Payments: View all payment records for this invoice (read-only)
Edit Payments: Add, edit, or delete payments (if not integrated with accounting software)
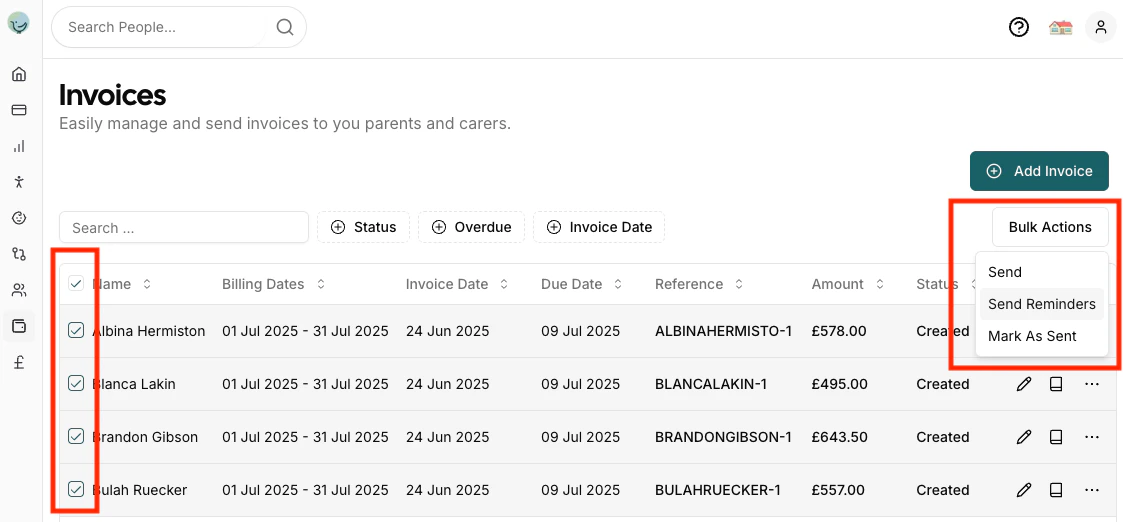
You can select multiple invoices and perform bulk operations:
Send: Send all selected invoices to their respective bill payers at once
Send Reminders: Send payment reminders for all selected invoices
Mark As Sent: Mark all selected invoices as sent without emailing
Resync: Queue all selected invoices to sync again to your accounting software. This action only appears when an accounting integration is enabled.
To use bulk actions:
Select the checkbox next to each invoice you want to include
Use the “Select all” checkbox in the header to select all visible invoices
Choose the desired action from the bulk actions menu
Shift-click to select a range: Click the checkbox on one row, then hold Shift and click another row’s checkbox to select all rows in between. This works across all list pages with checkboxes.