
Capturing on your phone? See Observations in the staff app. Open in app: Development → Observations.
The Observations page
Go to Development → Observations in the sidebar. Each card shows the first photo, the title, the start of the write-up, the children tagged and the date. A pill in the corner shows its status.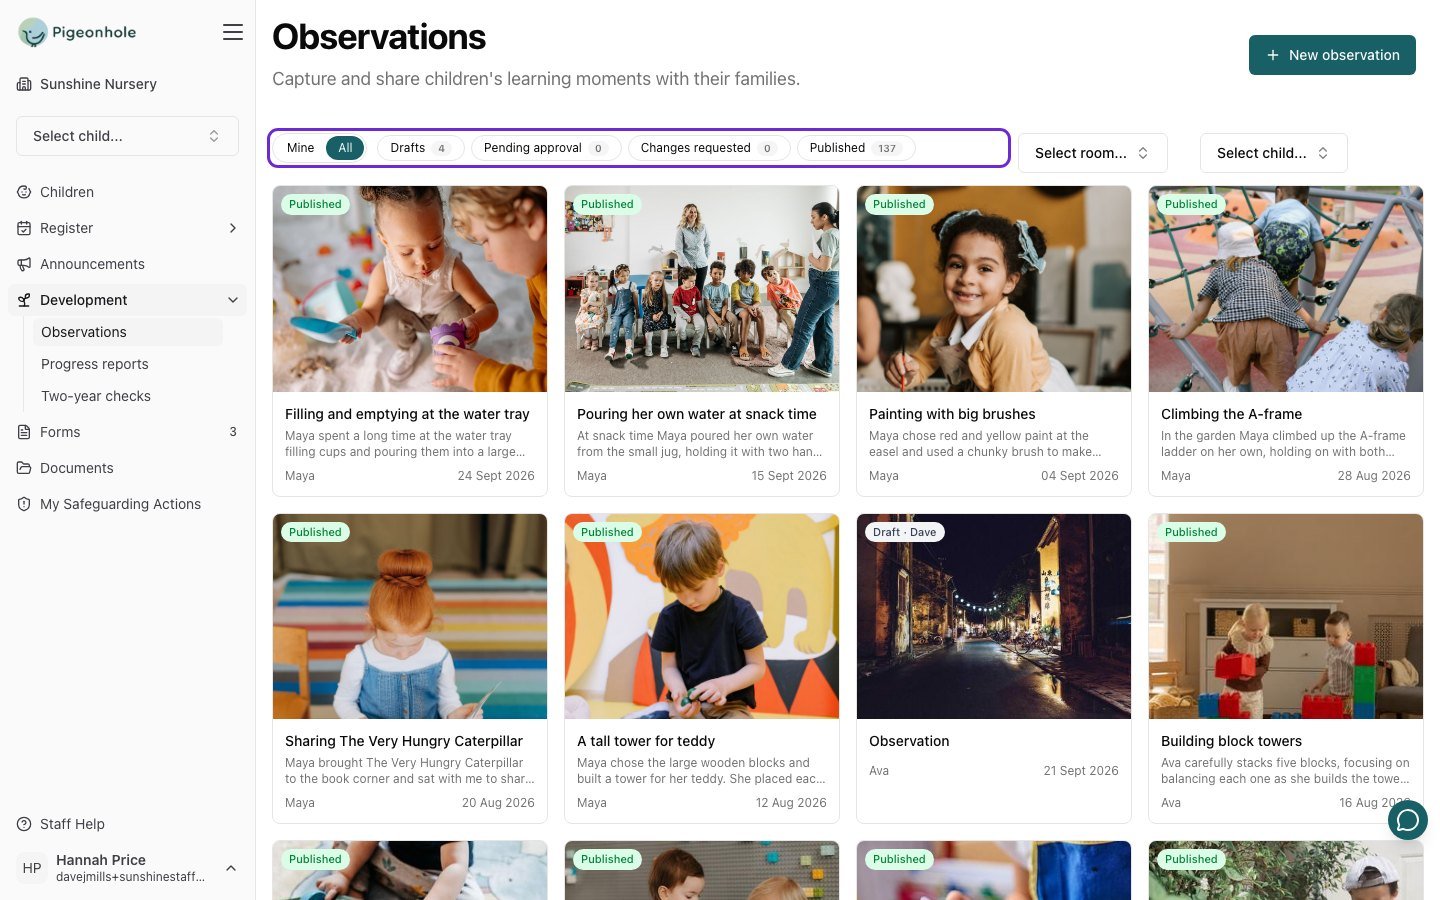
- Mine shows only your own observations. All shows everything you can see: everything published, plus colleagues’ drafts if your setting shares them.
- The status chips — Drafts, Pending approval, Changes requested and Published — filter the list. Each chip shows how many observations it holds. Click more than one to combine them.
- Select room… and Select child… narrow the list to one room or one child.
Step 1: Add photos and tag the children
- Click New observation.
- Click + Add photos or video and choose one or more files. You can add more at any time while you’re writing.
- Under Children, pick every child involved. For a group activity, tag them all. Each family sees it in their own child’s journal.
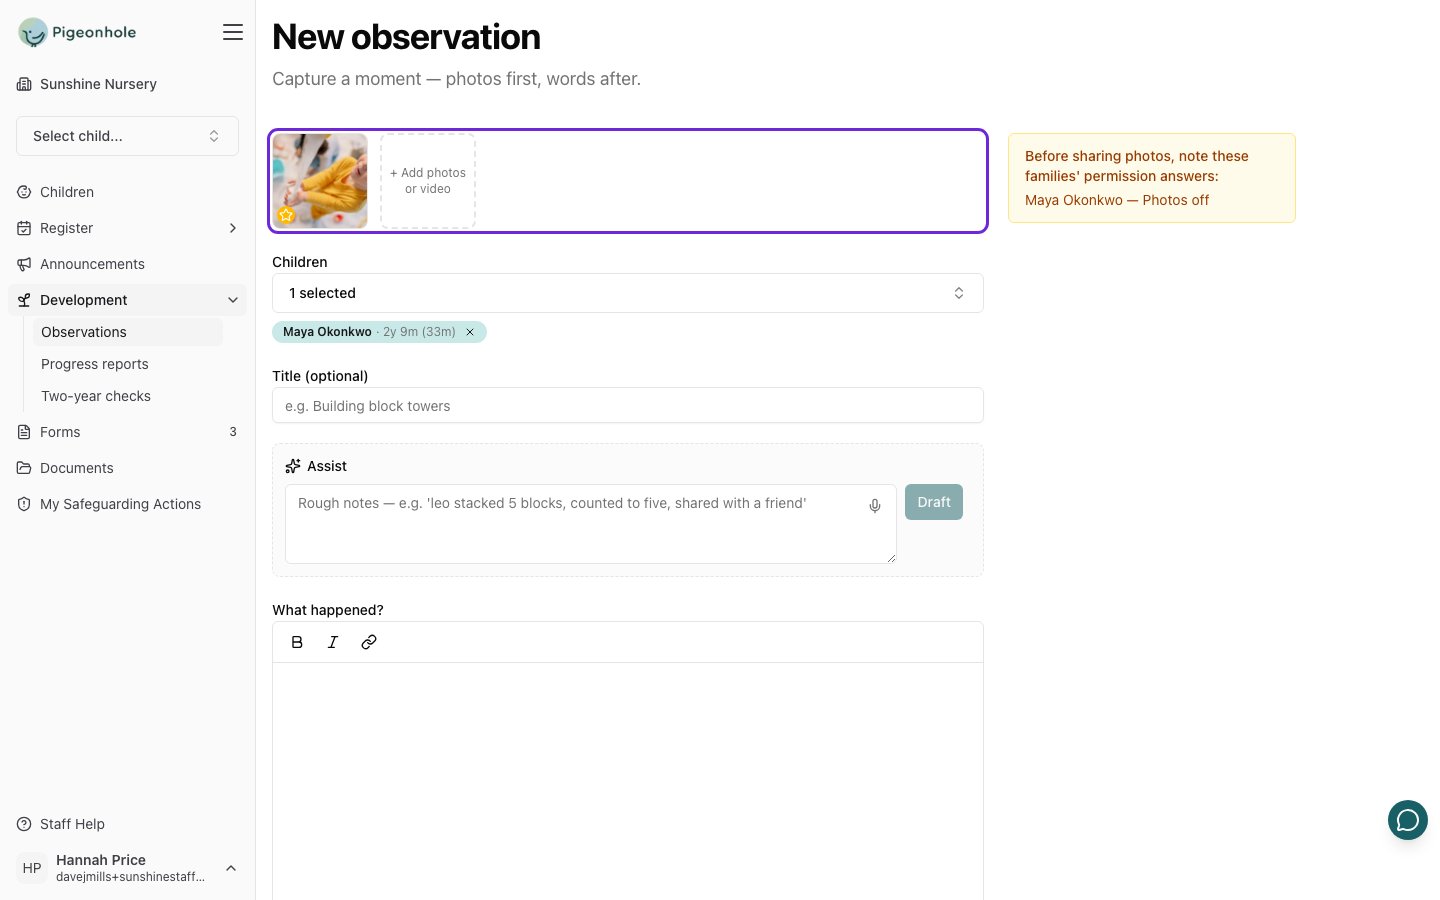
If a tagged child’s family hasn’t agreed to photos, an amber reminder appears beside the form — for example “Maya Okonkwo — Photos off”. It doesn’t stop you saving. Check whether that child can actually be seen in your photos, and remove or swap the photo if so.
Step 2: Write what happened
- Add a Title if you like, such as Making sand castles. If you leave it blank, the start of your write-up is used instead.
- Describe the moment in What happened? Say what the child did and said, as specifically as you can.
- Add Next steps if you have an idea for what to try next. These are optional.
- Observed on defaults to now. Change it if you’re writing up something from earlier.
Let the AI assistant draft it for you
If your setting uses AI drafting, you’ll see an Assist box above What happened?. Type your rough notes in any shorthand you like, then click Draft:maya at sand tray, filled bucket with spade, patted it down, tipped it over to make a castle, said ‘look a castle!’, put shells on top, counted 1 2 3 shellsA few seconds later the write-up appears in What happened?. If they were empty, the title and next steps are filled in too.
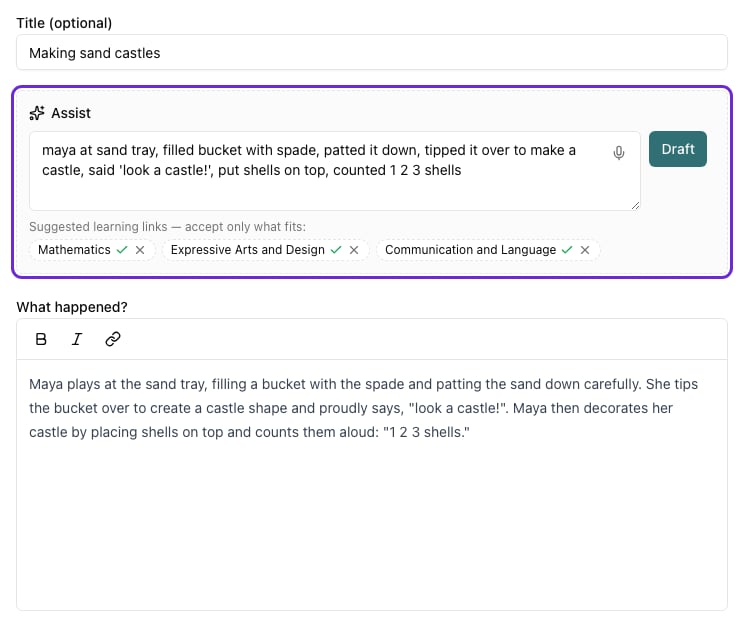
- Click the microphone in the notes box to dictate instead of typing. Click it again to stop. What you said is added to your notes, so you can check it before you click Draft.
- The draft replaces whatever was in What happened?. A title or next steps you’ve already written are left alone.
- It only uses what’s in your notes, and won’t invent detail. Short notes give a short observation.
- Suggested learning links may appear under your notes. Click ✓ to accept a link or ✕ to dismiss it. Nothing is added unless you accept it.
- Your photos are never sent to the AI. Only your typed or dictated notes are.
It’s your observation, with your name on it. Always read the draft and correct anything that isn’t quite right before you submit it.
Step 3: Add learning links
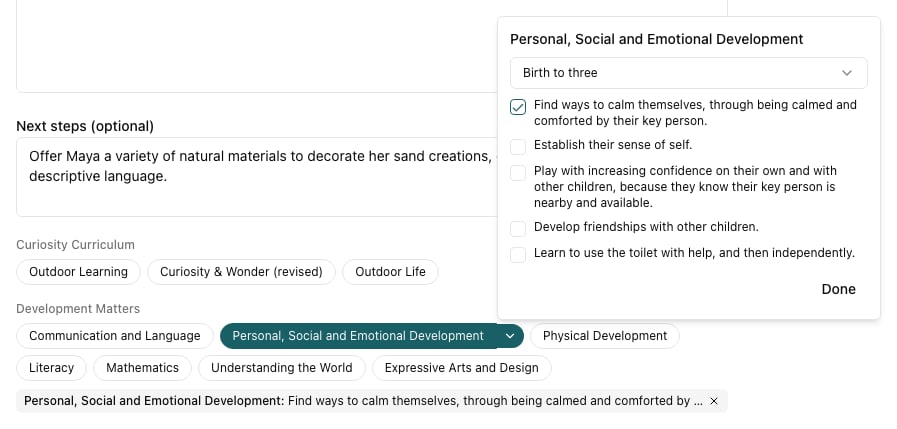
If your setting links observations to areas of learning, the areas from each framework appear as chips below Next steps. They’re grouped under the framework’s name, such as EYFS Areas of Learning or Development Matters. Click a chip to link it, and click it again to unlink it. Some frameworks, such as Development Matters, also have statements within each area. Once you’ve picked one of those areas, click the ▾ next to it to choose statements:- Check the age band. It starts at the youngest tagged child’s age.
- Tick the statements this moment shows.
- Click Done. Each statement appears as a chip under the framework, and you can remove it with its X.
Step 4: Save, submit or publish
The buttons at the bottom depend on your role:- Save draft keeps your work without sharing it. Come back to it from the Drafts chip whenever you like.
- Submit for approval sends it to your setting’s approvers, who are emailed. This is what most staff see.
- Publish shares it with the families straight away. You’ll only see this if you have the Publisher role or you’re a manager. You’re asked to confirm first.
Writing reminders
When you submit or publish, your writing is checked against your setting’s writing rules. If something is flagged, an amber box appears above the buttons showing the phrase, the rule it breaks, and a suggested rewrite.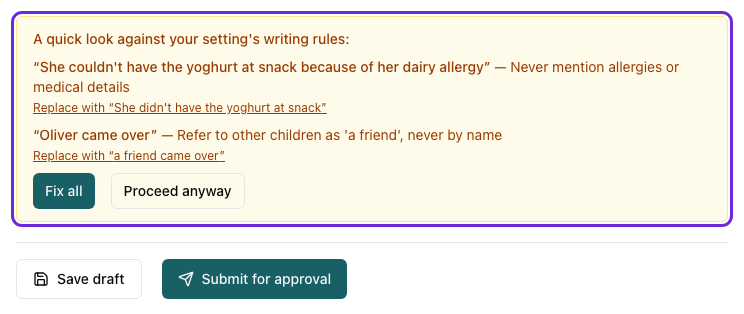
- Click Replace with ”…” to accept one suggestion.
- Click Fix all to accept them all. Click Submit for approval (or Publish) again when you’re happy.
- Click Proceed anyway to carry on with your writing as it is.
After you submit
While your observation is Pending approval, you can still change your mind. Open it and click Withdraw to take it back to your drafts.If it comes back to you
An approver may return an observation with a comment saying what needs changing. You’ll get an email, and the observation shows as Changes requested. Open it and click Edit: the comment is at the top of the form.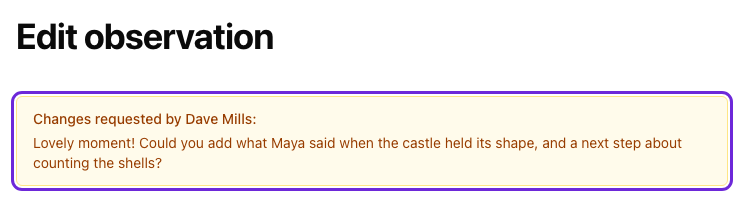
Once it’s published
Published observations can’t be edited by regular staff. If you’ve tagged the wrong child or spotted a mistake, ask a manager or a colleague with the Publisher role. They can edit it even after families have seen it. Open a published observation to see everything on it: the photos, the write-up, next steps, the children tagged with their age at the time, and the learning links.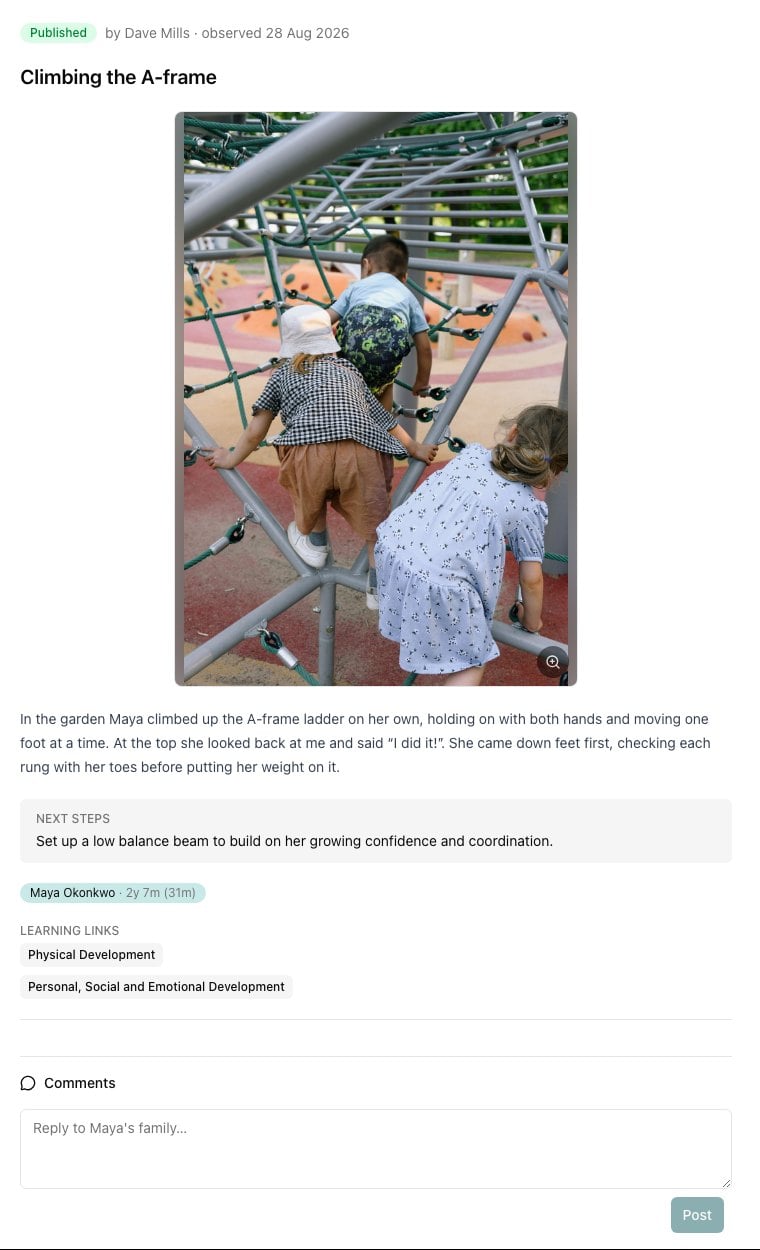
Working on a colleague’s draft
Your manager can choose to share drafts with all staff, so the team can finish or tidy up each other’s write-ups. When drafts are shared:- Colleagues’ drafts appear under All, with the author’s first name on the Draft pill — for example Draft · Dave.
- If your setting allows editing, open the draft and click Edit. A note at the top reminds you whose draft it is.
- You can only Save draft. Submitting, publishing and deleting stay with the author.